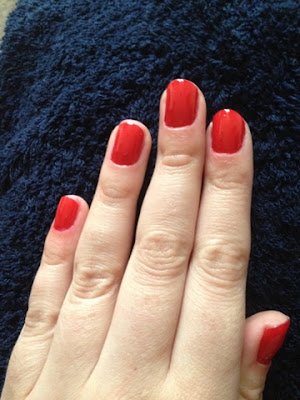
Nothing says vintage glamour more than red lips and red nail polish. I do try my hardest to maintain manicured mitts however life sometimes takes over and you have to revert to au naturale. But when i do get those rare moments to pamper myself i love nothing more than to give myself a manicure.
You will need:
Step One:
Make sure your hands are clean and nail polish free. Cut your nails to a little bit longer than the desired final length and file them to whatever shape you like. I prefer to have short, rounded nails.
Step Two:
Now its time for a soaking! Pop your hands into a bowl of warm, soapy water for about 5 minutes or until your cuticles are soft and your fingers are pruney!
Step Three:
If you need it put a little bit of cuticle remover on your cuticle. If not just go ahead and push those babies remember sure to be gentle and careful not to hurt yourself. Make sure that you get all the cuticle off your nail as this will help in making your nail polish last longer.
Step Four:
Now i do a Brazilian manicure and this involves removing the cuticle completely. Most European manicurists don't do this, they trim the excess cuticle and do not remove it all. I am not an expert by any means and i do this for fun so its your choice, do this step your way and however you feel comfortable.
After working with the cuticle make sure to hydrate it with a little hand cream. Pop on a base coat if you wish and wait for that to dry.
Step Five:
Now comes the polish!!! My favourite is one that my auntie sent over for me from Brazil but there are countless reds you can get in Boots that are fab. I prefer a bright red to make sure it pops and stands out.
Paint away ladies making sure you don't miss any spots.
Take a orange stick and run it along the sides and base of the nail to take away some of the excess polish but don't worry if there is a little bit left we will get that at the end.
As you can see i take no prisoners and just go for it. Looks like a four year old has got hold of the nail polish but fear not it will look lovely when finished!
Step Six:
Wait for that coat to dry and add a second if necessary.
Now dip the end of the orange stick in the nail polish remover and grab a little cotton wool ball. Roll the pointed end of the stick in the cotton ball so it sticks to it and makes what looks like a pointed cotton bud like the picture.
Now dip again in the nail polish remover and touch up the sides to get the remaining excess polish off there.
Add a top coat and wait for your nails to DRY!!! This is always the hardest part for me as i always for get and go to do something and smudge all that hard work. Take the time to let them dry and your manicure will last.
A little pampering, a little fun and Bob's your uncle, a professional looking manicure at home!
Don't forget to mix it up. Other colours such as pinks and corals were also popular in the 50s so try something new.

Pamper those mitts and let me know how it goes!
Hugs and Kisses
Ana


This is a great step by step guide! Clear and easy to follow, thank you! lovely blog too.
ReplyDeleteThanks so much, I'm glad you liked it :) x
DeleteIt's always so helpful to see what other colors were popular then. I love classic red but a change is nice too!Thanks for following my blog.
ReplyDeleteI also use that technique, very practice and easy =)
ReplyDeleteAnd hunny,thank you so much for follow my blog!!!
XOXO*
MissLil'Susie ♥
No problem. It's nice for me to read a vintage blog in portuguese for a change x
Delete